
Using The Mango Voice Switchboard
The Switchboard is the heart of your Mango Voice phone system. Without it, your calls would go nowhere. Learning how to manage and understand the Switchboard will help you maximize your phone system's effectiveness. Read this guide to better learn how your Switchboard works and how to properly configure it.
Drag. Drop. What?
When you first look at the switchboard it may seem overwhelming, but it is quite simple once you learn how it works. The switchboard call flow always begins at the Start icon in the top left, then it goes from left to right, like a book.
Follow the orange line road
The switchboard is logic-based, so it will travel to one object, read that object, and depending on what the object says, it will follow the logic after that. Look at the picture below of a basic switchboard setup.
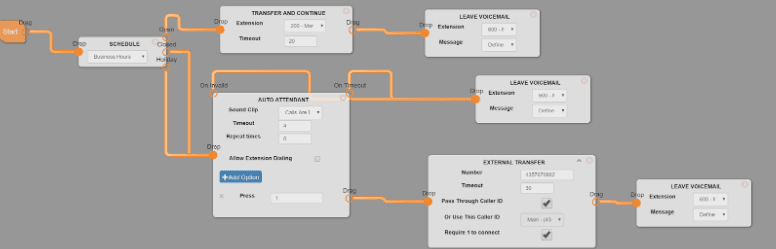
It begins at the Startthen goes to a schedule and asks “Is this business open, closed, or is it on a Holiday?” Based on the answer it gets from the Schedule module, it moves on to its next step. If the business is open, it follows the open path to the Transfer and Continue module and then to the Leave Voicemail module. If closed or Holiday, it will go to the Auto Attendant and give your customer the options you've configured.
Switchboard Tips
- You can delete a line on the switchboard by simply clicking it.
- When you're ready to make your changes go live, make sure you press the green Save button!
- Any saved changes to the switchboard are active immediately.
Switchboard Modules (Objects)
Each module below is a building block you drag onto the switchboard. Connect their Drop and Drag points to define how a call moves through your system.
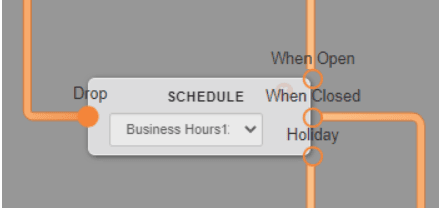
Schedule
Checks the schedule and takes action based on the Open, Closed, or Holiday settings on the Schedule tab. This is usually the first module on a switchboard. It effectively opens and closes your phones.
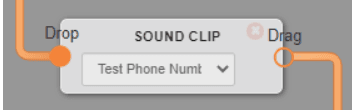
Sound Clip
Plays a sound clip and moves to the next switchboard object.
Auto Attendant
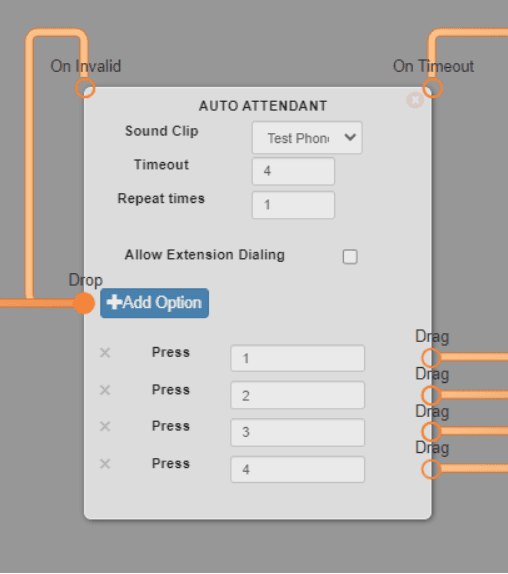
Plays a message that tells callers to press a specific button to reach their desired destination.
Example: New Patients/Customers Press 1, For Existing Patients/Customers Press 2, For Billing Press 3, For all other concerns Press 4.
Auto Attendant Options
- On Invalid— Followed when the caller presses a button that isn't configured in the Auto Attendant.
- On Timeout— Followed when the caller doesn't press any button during the Timeout value.
- Repeat Times— Number of times the Auto Attendant will repeat the message you've recorded.
- Allow Extension Dialing — Allows the caller to enter the extension they want to reach directly from the Auto Attendant.
- Add Option — Click this to add Press option fields to your Auto Attendant.
- Press — The number you want callers to press to reach a certain destination.
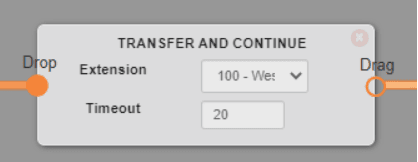
Transfer and Continue
Rings for a set period of time before moving to the next object in the call flow.
Transfer and Continue Options
- Extension — Extension or Ring Group that you want to ring.Note: for single extensions we recommend using the Transfer and Rollover module.
- Timeout — Amount of time the devices set in Extension will ring.
Transfer and Rollover
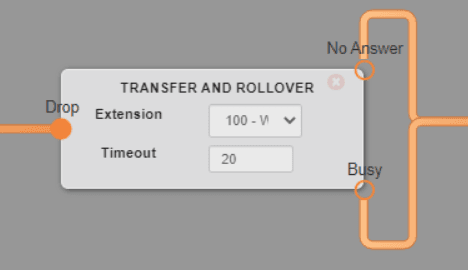
Rings the extension for the timeout specified and then takes the No Answerpath if the call isn't answered. If the extension is unavailable (DND turned on, or Call Waiting disabled and on a call) the call is immediately sent to the Busy path.
Transfer
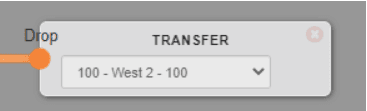
Transfers a call directly to an extension. The extension will ring, and if not answered will send the call to that extension's voicemail.
External Transfer
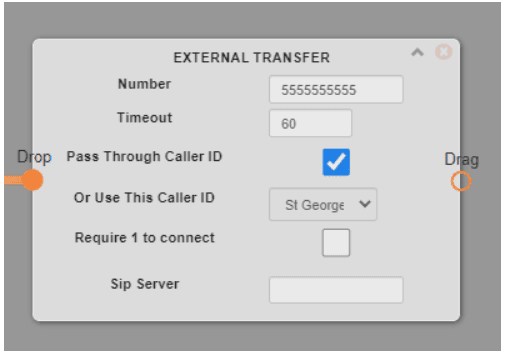
Transfers a call to the number you specify in the Number field.
Note:5555555555 is used for demonstration purposes only. Please use a valid phone number that is not on your account's PBX.
External Transfer Options
- Number— The phone number you're transferring to. This is generally a cell phone, answering service, or another office location that is not on your PBX.
- Timeout — The time the system will try to send the call to that number before moving to the next object in the call flow.Note: If the intent is to have the call sent to the external number and not return to Mango, then use a timeout over 60 seconds. If the intent is to pull the call back into the system, then use Require 1 to connect and make sure you connect a voicemail object or other object to the Drag button on the External Transfer module.
- Pass Through Caller ID — Tells the system to either pass through the caller ID of the calling party or to use the setting under Or Use This Caller ID.
- Require 1 to connect— Requires the called party to press 1 to connect the call. If 1 isn't pressed and the timeout is reached, the call continues to the next object in the call flow.
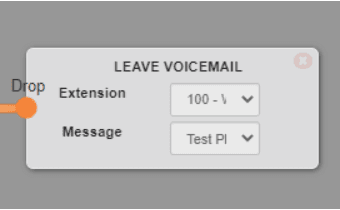
Leave Voicemail
Allows the caller to leave a voicemail on the extension specified.
Leave Voicemail Options
- Extension — The extension where you want voicemails left.
- Message — The Sound Clip you want played before the message prompt.
SMS Notification
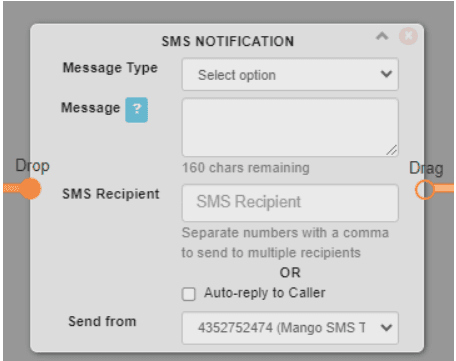
Sends an SMS message to your chosen recipient when the call reaches this object.
Note — Due to FCC Regulations: Use of this feature requires a number that has been registered with The Campaign Registry. Contact Mango Support at 435 GO MANGO to make sure your number is set up correctly before using this feature.
SMS Notification Options
- Message Type — Choices are:
- Missed Call — Lets recipient know a call was missed.
- Incoming Call — Alerts recipient to incoming call.
- Voicemail — Alerts recipient that call went to voicemail.
- Custom — Sends custom message to recipient.
- Message — Missed Call, Incoming Call, and Voicemail have pre-defined messages. Custom allows you to craft your own message.
- SMS Recipient — The number(s) to which you are sending SMS Notifications.
- Auto-reply to Caller — The system automatically sends an SMS to the caller.
- Send From — This is the number from which the SMS messages are sent. Reminder: this number must be TCR registered.
Day/Night
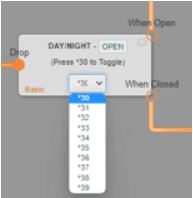
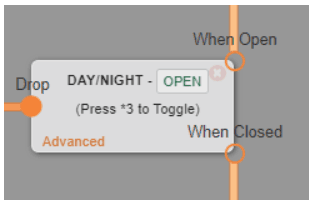
Toggles between Day and Night. Essentially an On/Off switch.
Day/Night Options
- Open — Calls follow the Open path.
- Closed — Calls follow the Closed path.
- Advanced — Changes the toggle key sequence from *3 to your choice of *30 – *39 on your phones.
Wait
Inserts a delay equal to the Duration value. You can choose to have the caller hear ringing during the wait. This is commonly used when a FAX Detect object is used to give the system time to test for FAX tones.
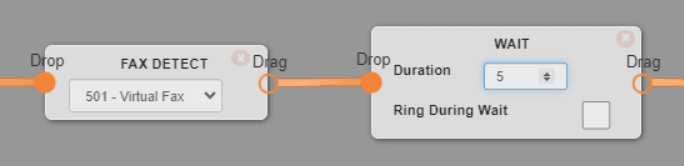
Fax Detect
Allows one number to work for Voice and FAX calls.
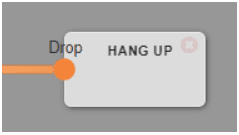
Hang Up
Hangs up a call.
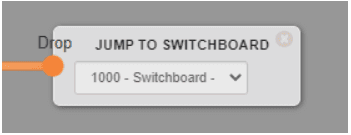
Jump to Switchboard
Sends a call to another switchboard. Once there, the calls follow the logic of that switchboard.
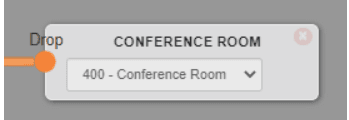
Conference Room
Sends caller to the selected Conference Room.
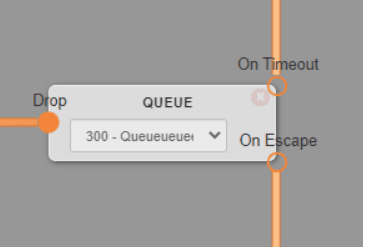
Queue
Sends caller to the configured queue. For more information on setting up and configuring a call queue, see Mango Call Queues or call Mango Support at 435 GO MANGO.
Call Distribution
Distributes calls between options according to the configured percentages. For detailed information on how this works, see Call Distribution.

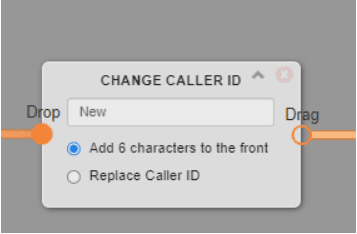
Change Caller ID
Either changes the caller ID or prepends up to 6 characters to the Caller ID.
Change Caller ID Options
- Add 6 Characters — Prepends up to 6 characters to the Caller ID. This can help staff know how to answer a call. I.E. New = New patient, Exist = Existing patient.
- Replace Caller ID — Replaces Caller ID with the text value in the object.
Need more help with your Switchboard?
For additional help with your Switchboard, contact Mango Support at (435) 466-2646.