
2 min read·Last updated: 04.23.2024
How to Set Up a Shared Voicemail
Shared Voicemails are a convenient way to allow a user or a group of users to receive and access voicemail boxes.
Create a Shared Voicemail
- Select the + symbol next to Extensions on the left side menu to open the extension options.
- Select Shared Voicemail.
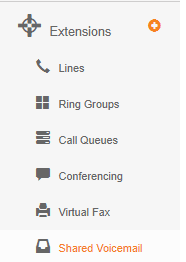
- Select + New Shared Voicemail.

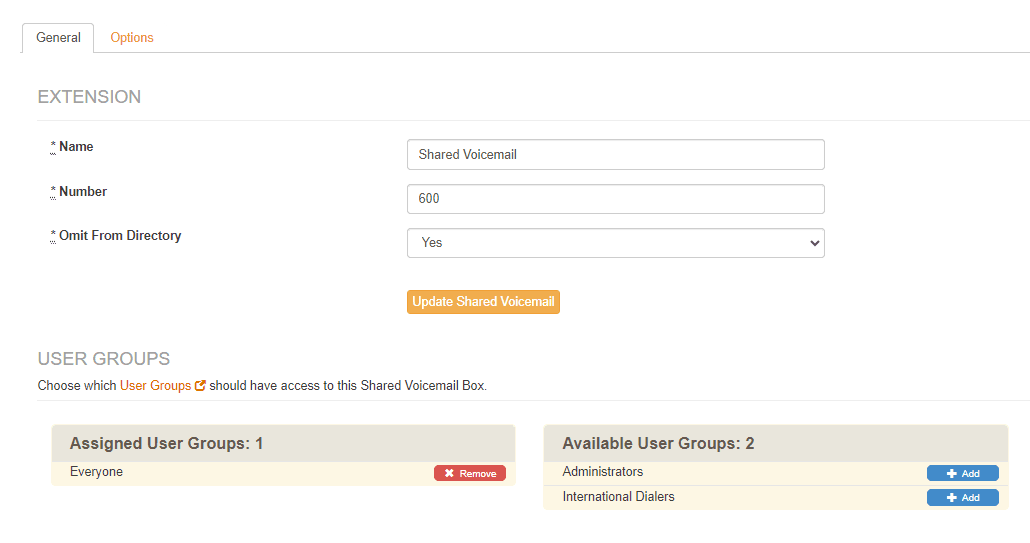
Under the General Tab
- Name the voicemail.
- Set a shared voicemail number.
- Select whether to omit it from the directory or not.
- A new extension will be seen by all extensions in the PBX.
- Queues, conference rooms, and shared voicemails may be omitted from the directory to eliminate confusion.
- By default, the Everyone Group is allowed access to the Shared Voicemail.
Additional Options to Configure
- Select the time zone.
- Set a voicemail box password.
- Determine if voicemail instructions will be played or not.
- Set email notifications to send or not.
- Select whether the voicemail message will be sent as an MP3 via email.
- Set the message to delete after being sent or not.
- Enter the email addresses of the recipients, separated by commas.
- Determine if the system will use default greetings or not.
- Set the outgoing message unavailable sound clip. Click here to learn about uploading sound clips.
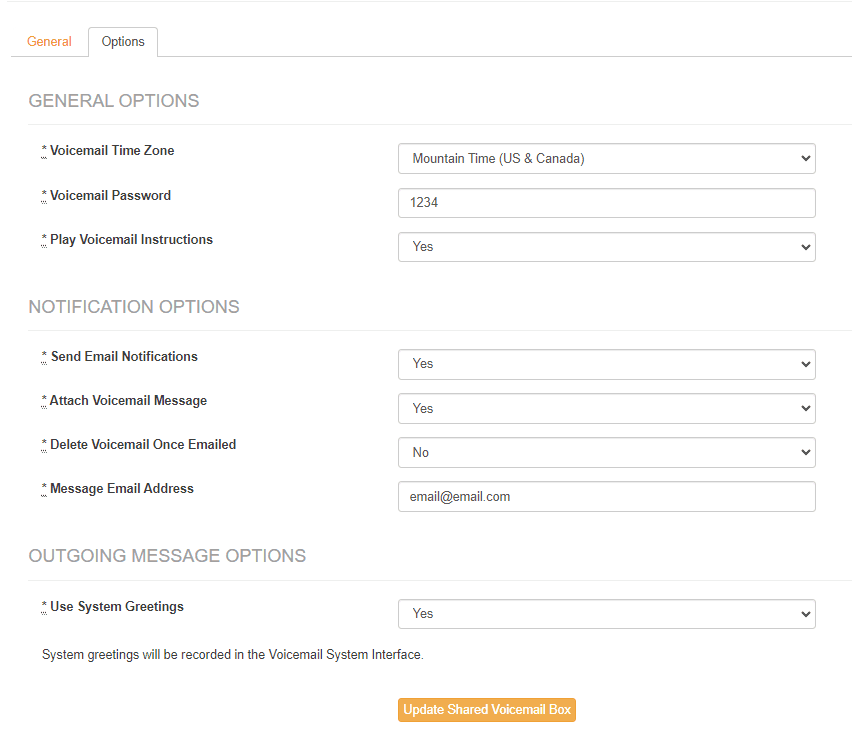
- Once you're done configuring the Shared Voicemail, click Update Shared Voicemail.
How do I get help?
- Mango Voice Support — Phone: (435) 466-2646
- Mango Voice Support — Email: support@mangovoice.com