
How to integrate and troubleshoot Oryx with Mango Voice
These are the documents from Oryx support about integrating with Mango Voice. Please ensure that your Mango Voice devices are set up and that you have completed the onboarding process before proceeding with the following instructions.
1. Setting up Mango Voice on your software
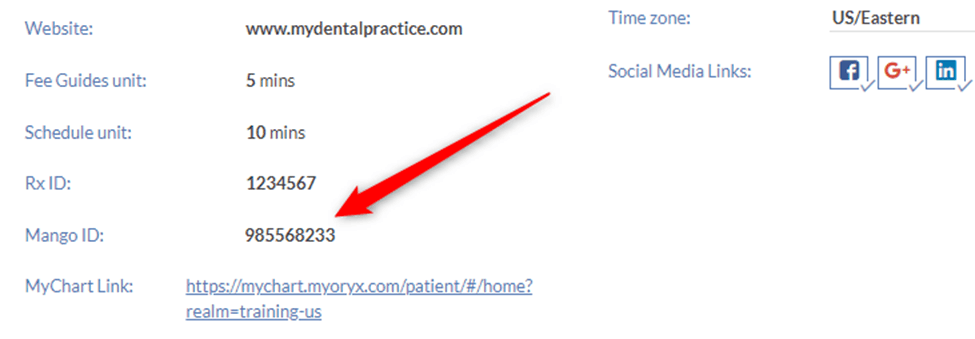
First, log in to your Oryx Realm and copy your Mango/Remote ID#. Navigate to Settings › Admin › Practice Set-up › Practice Information. Copy your Mango/Remote ID#, as shown below. This number will need to be added to your Mango Voice account.
- Proceed to log in to the Mango Voice web portal.
- Select “Integrations” from the list on the left.
- On the following screen, locate “Oryx” and select “Learn More”.
- Enter your Remote/Mango ID# (from Oryx).
You have finished the integration for Mango Voice. Please see the Mango Voice settings articles for how to enable the call pops on your software.
2. Mango Voice setting — show outbound call pops
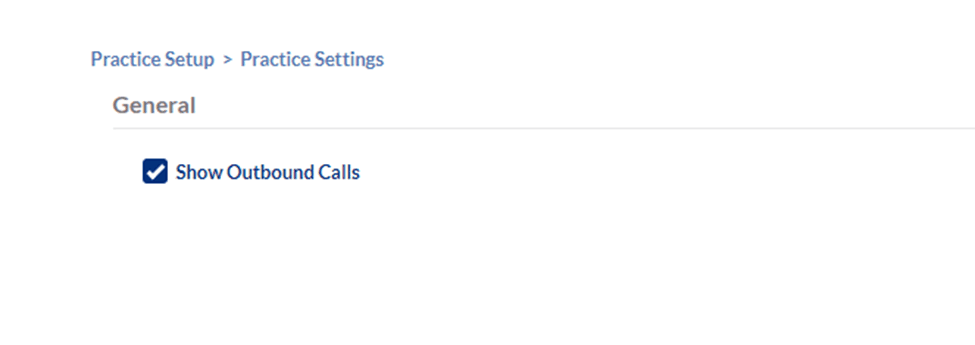
In Admin › Practice Setup › Practice Settings, you are able to check/uncheck the option to show or hide outbound call pop ups.
3. How to enable Mango Voice call pops
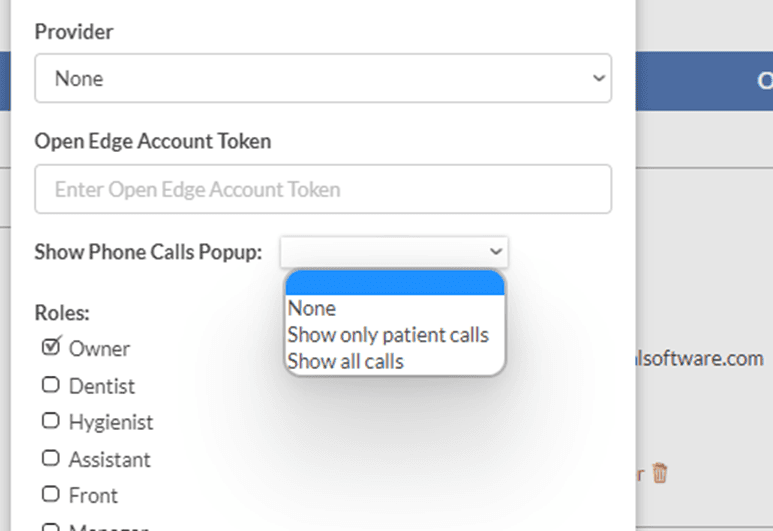
Navigate to Admin › User Management › Users › Edit User (repeat the following steps on each user you would like to have the phone call pops).
In the “Edit User” pop up, you have the option to set the user's phone call pop preferences. Once you have set the user's preferences from the dropdown and saved, the user will be able to see the call pops based on the settings set.
How do I get help?
- Mango Voice Support — Phone: (435) 466-2646
- Mango Voice Support — Email: support@mangovoice.com